Employee Management
The Employee Management module provides complete visibility into your organization's workforce. From onboarding new hires and sorting them into teams, to managing HR documents and tracking career milestones, this module acts as a unified directory built for modern companies.
1. The Employee Directory
Your central hub for viewing and filtering all team members.
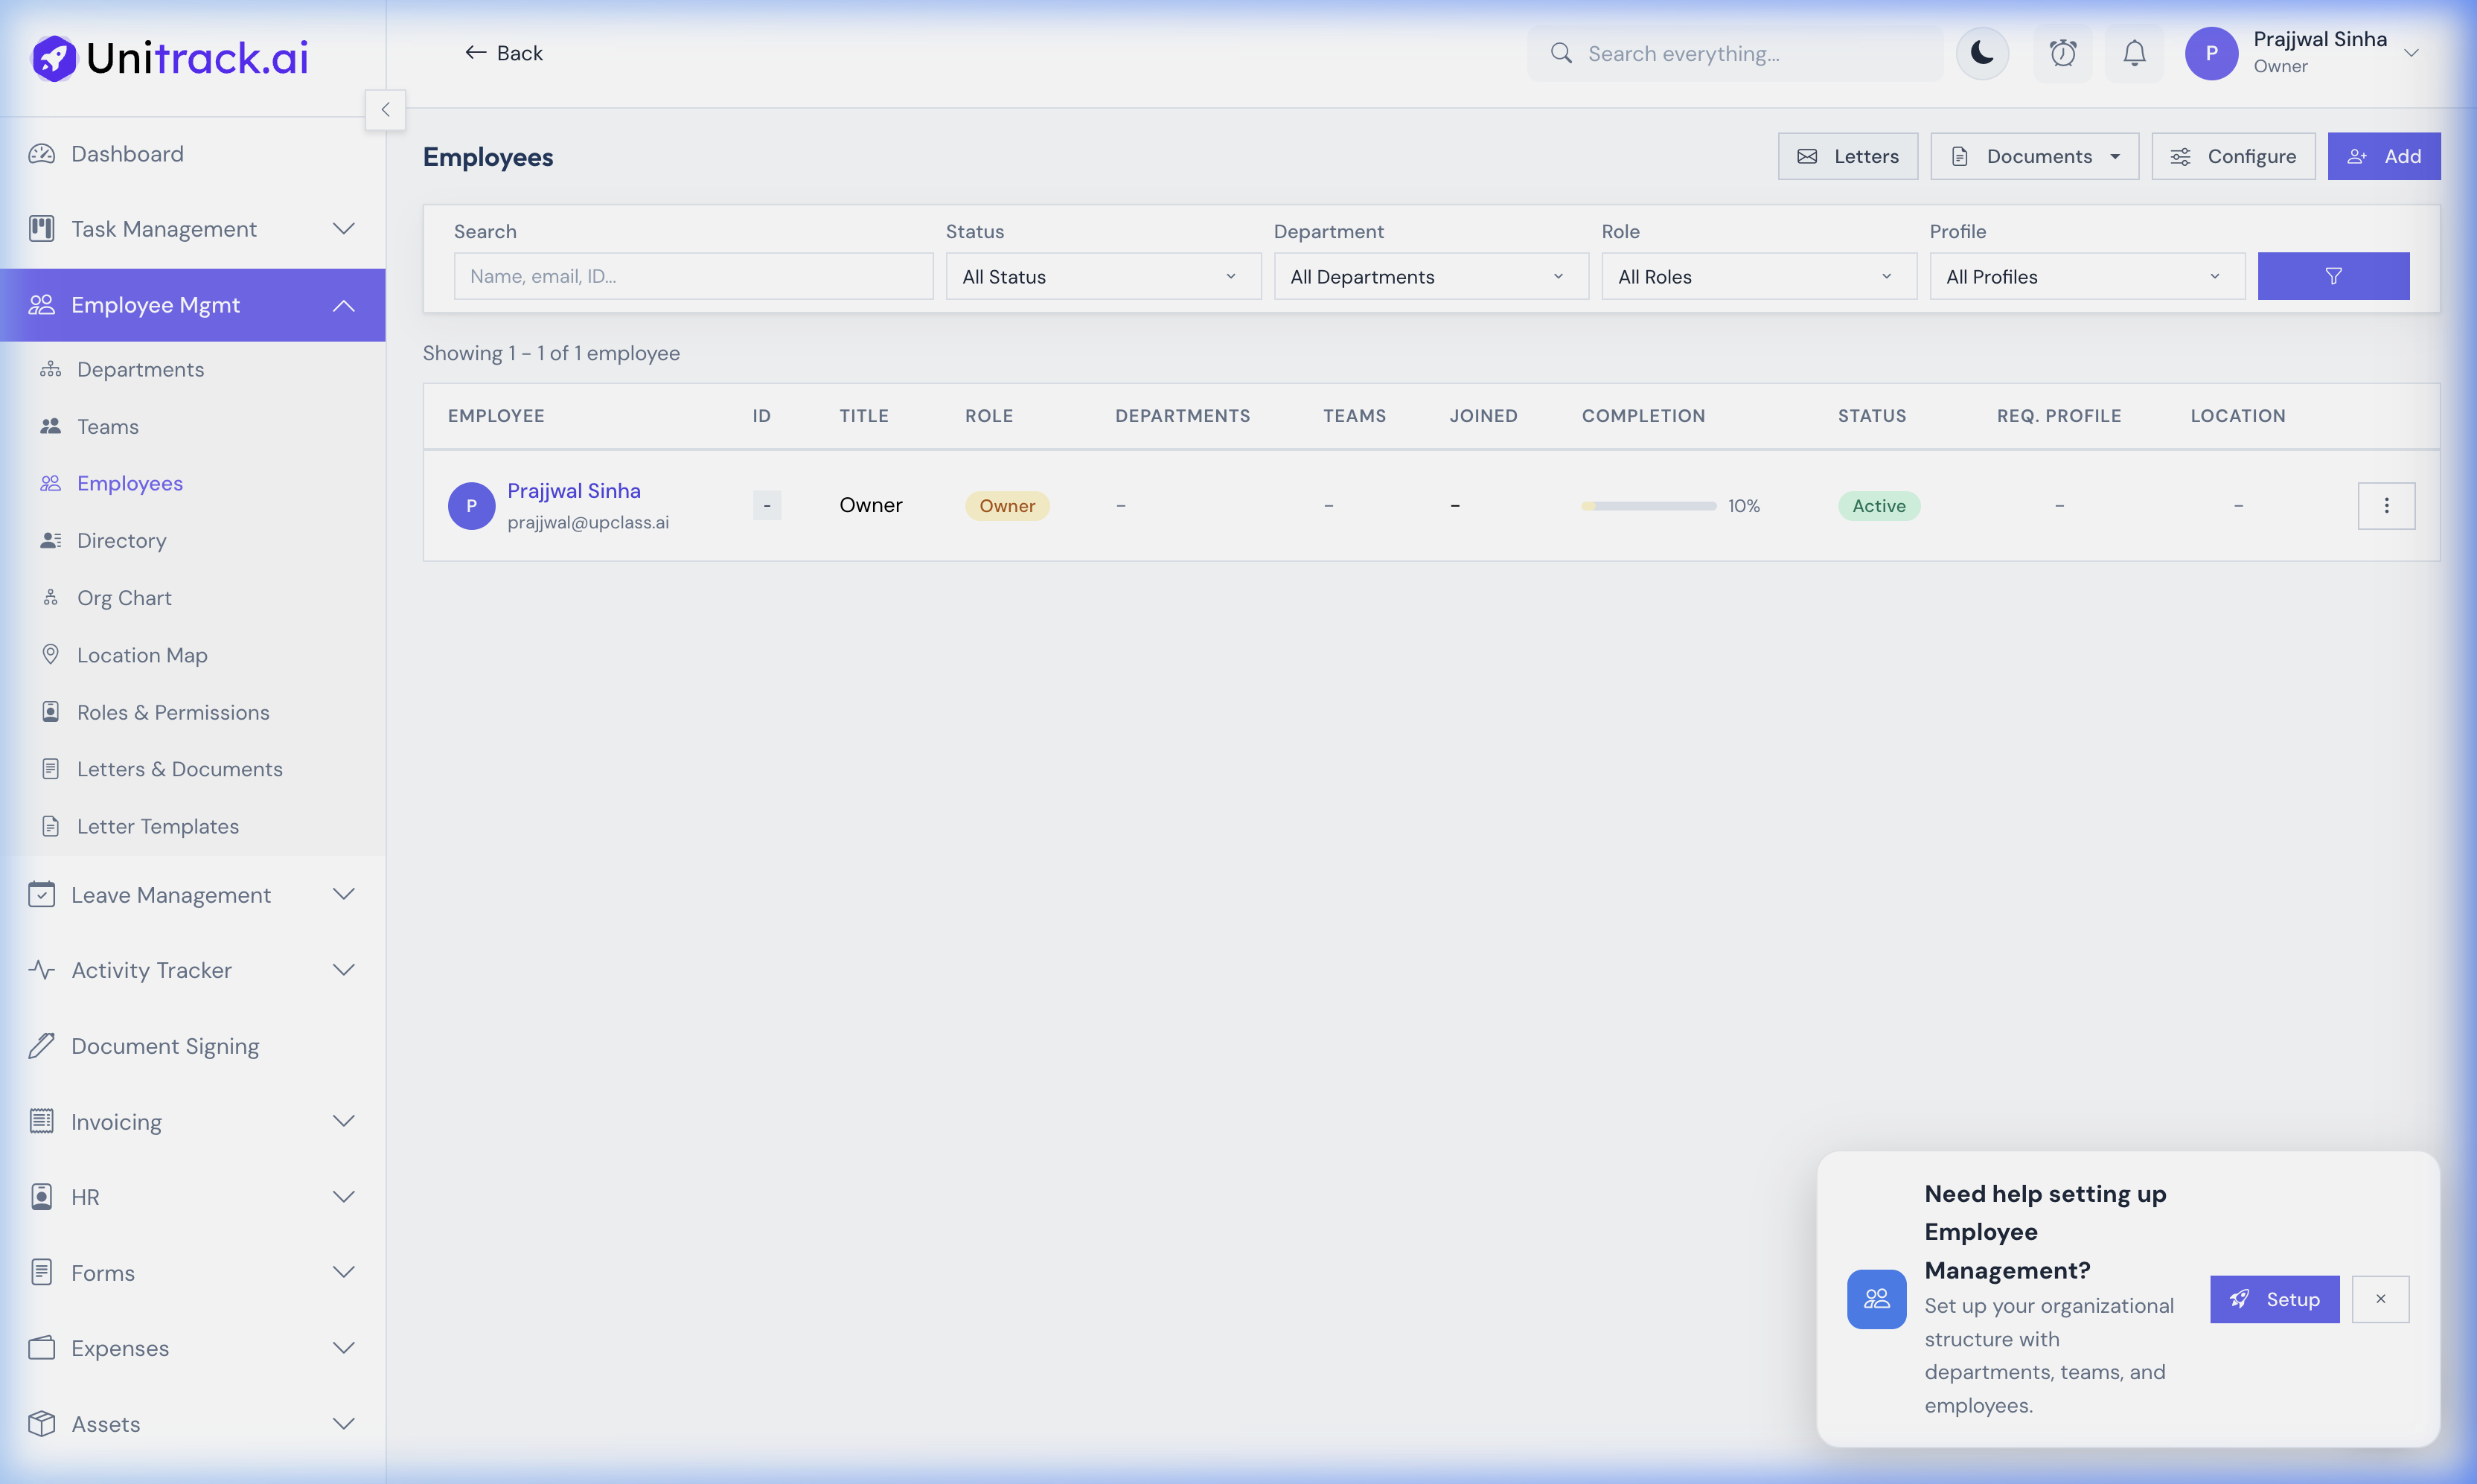
- 1Navigate to Employees
From the main sidebar navigation, click on Employees. This directory displays every registered employee along with their assigned role, primary and secondary departments, and designated sub-teams.
- 2Filter by Status & Department
Use the top filter bar to quickly search for individuals by name or ID, or filter the entire list by Status (e.g. Active, On Leave, Terminated), Role, and Department.
- 3Monitor Onboarding & Toggles
The "Completion" column gives HR a quick visual on how much of the employee's self-service profile has been filled out. Owners and Admins can also toggle the "Req. Profile" (blocking access until the profile is completed) and "Location" (enforcing tracking) switches directly from this table.
2. Company Structure: Creating Departments
Before adding employees into the system, you must establish the top-level functional areas of your organization (e.g., "Engineering", "Sales", "Human Resources").
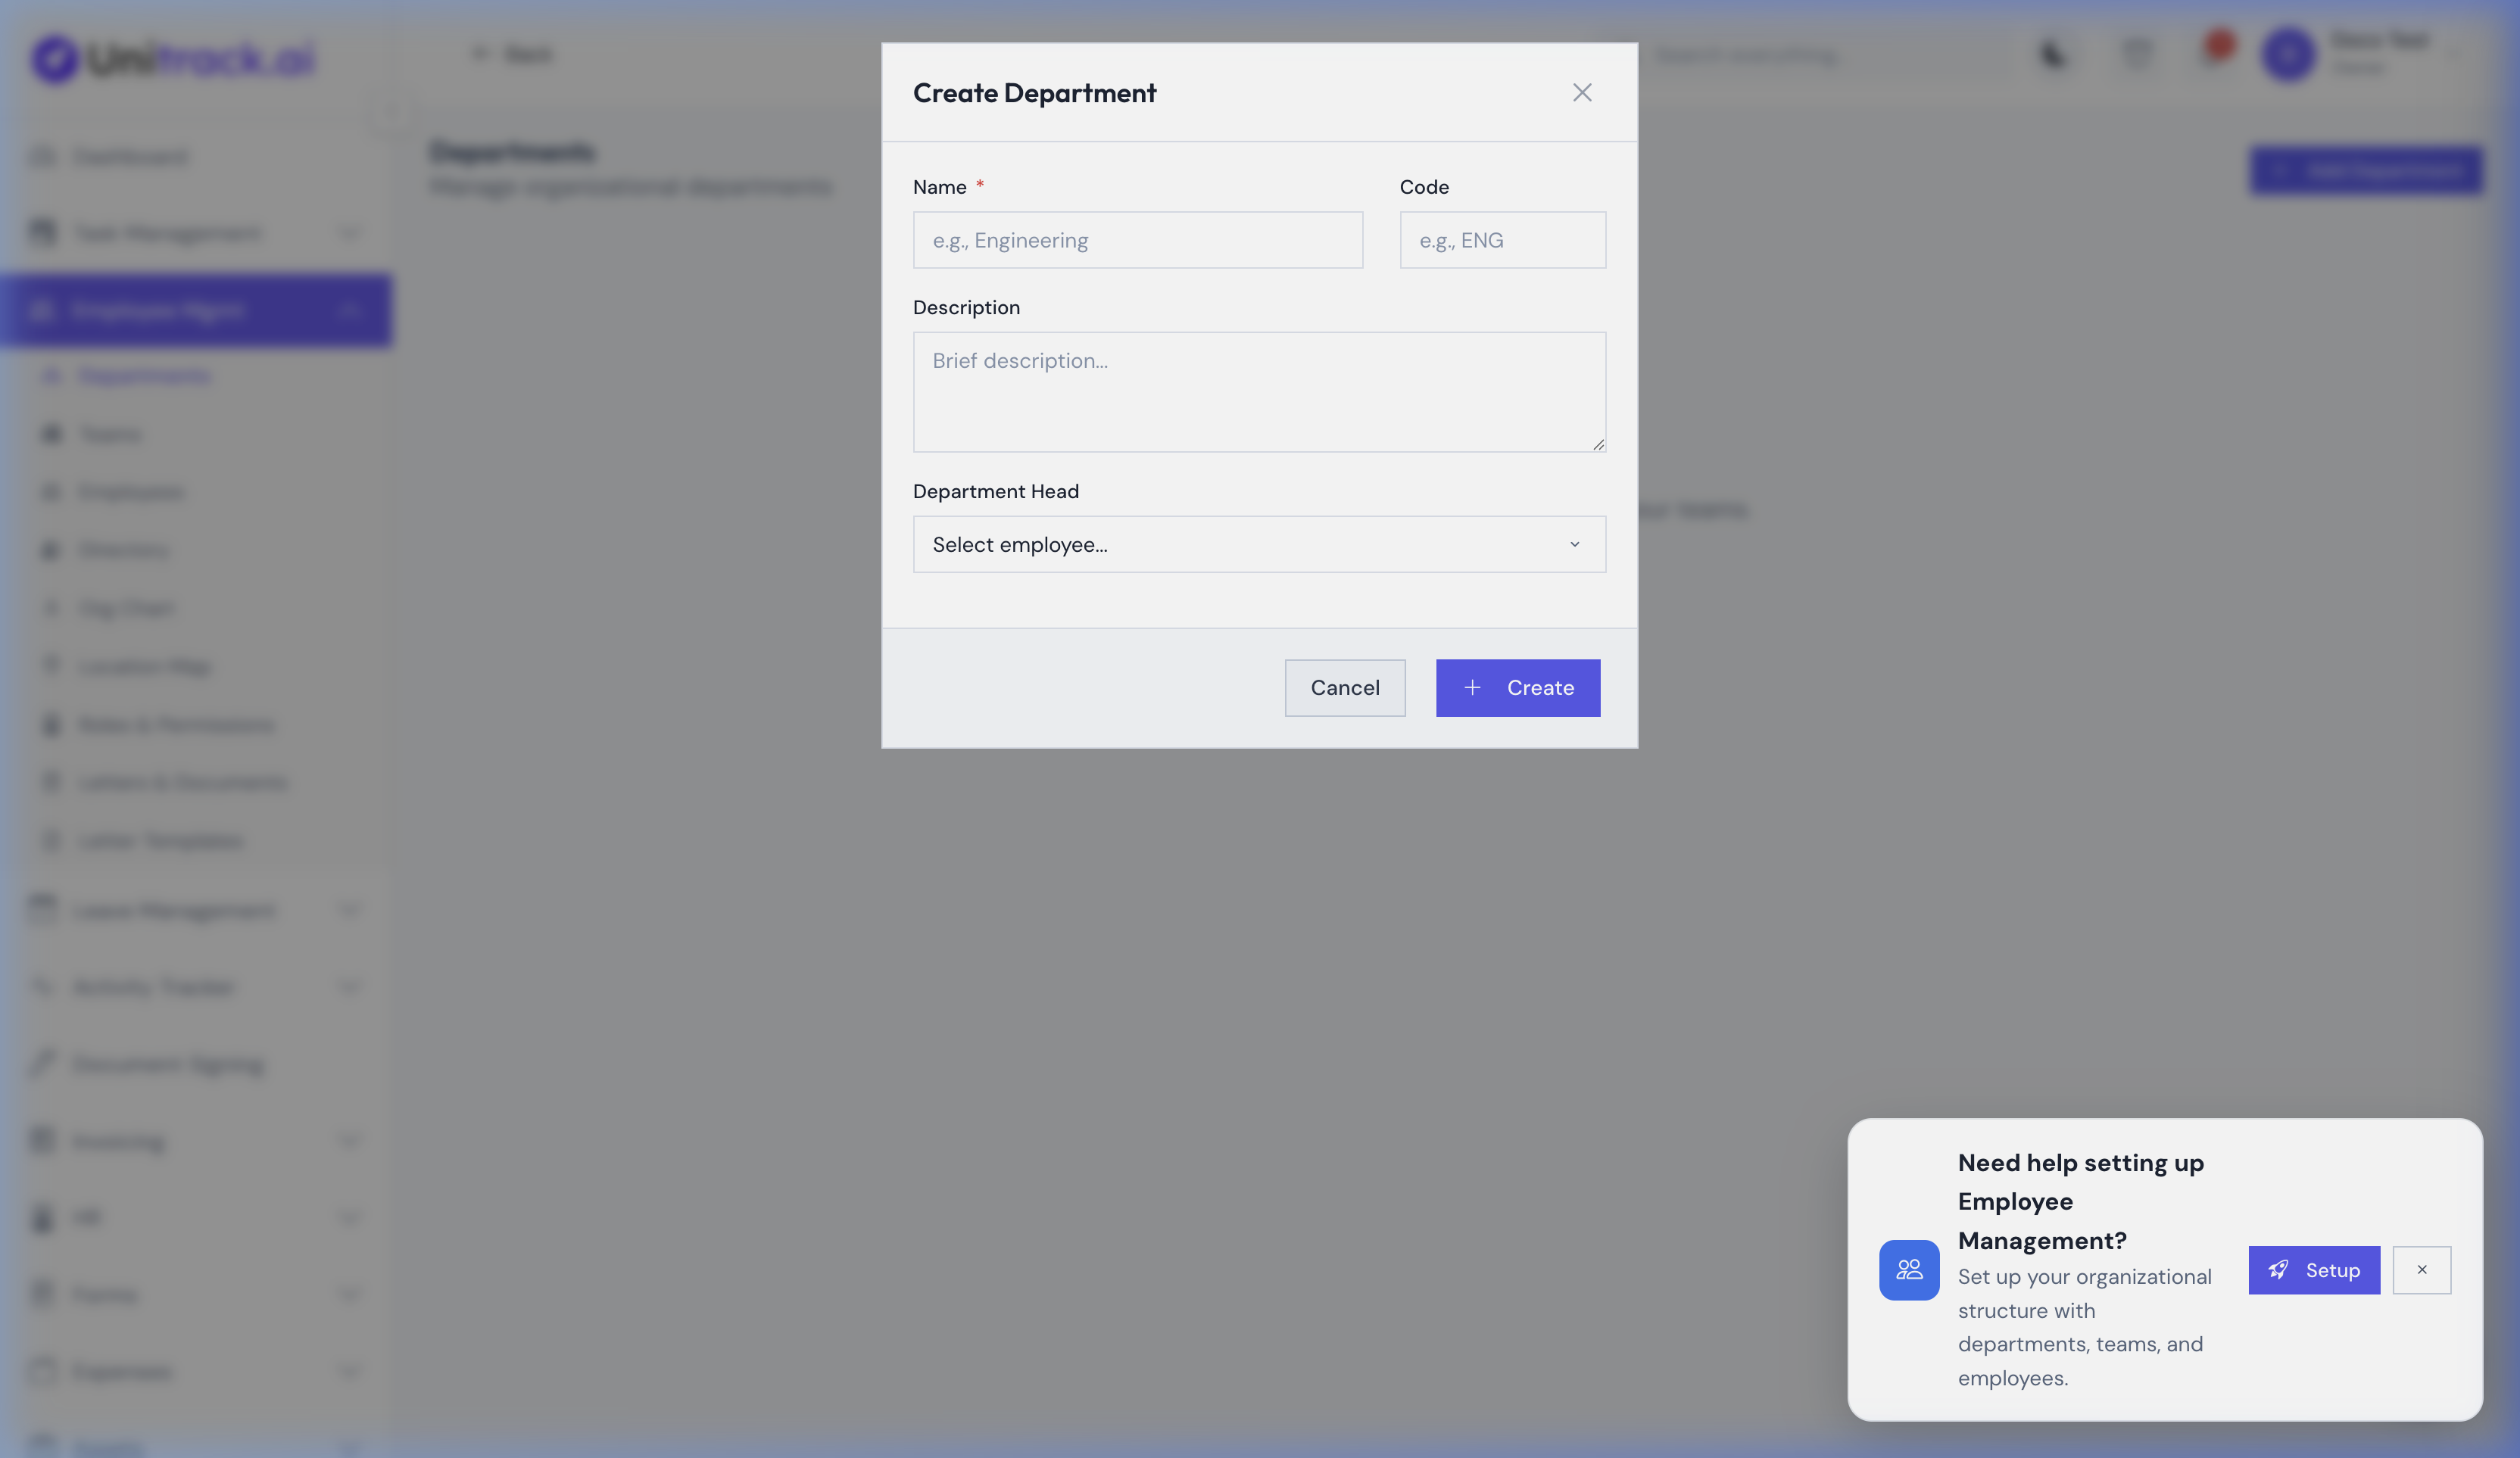
- 1Open the Department Form
From the main sidebar, navigate to Employee Mgmt → Departments. Click the + New Department button located at the top right of the screen.
- 2Fill the Exact Department Details
Name: Enter a clear, recognizable name like "Marketing" or "Finance". This is mandatory.
Description: (Optional) Briefly describe the department's core function. This helps new hires understand the org structure.
Manager/Head: (Optional initially) Once you have added employees into the system later, you will edit this department and select the Department Head from the dropdown. This person automatically acts as the ultimate escalation point for approvals (like leaves or expenses) for everyone assigned to this department. - 3Save and Verify
Click Save Department. The department will now appear in your master list and can be used to organize new teams and employees.
3. Company Structure: Creating Teams
Teams are specific sub-groups within your Departments (e.g., "Frontend Devs" inside the "Engineering" department). This establishes granular reporting lines.
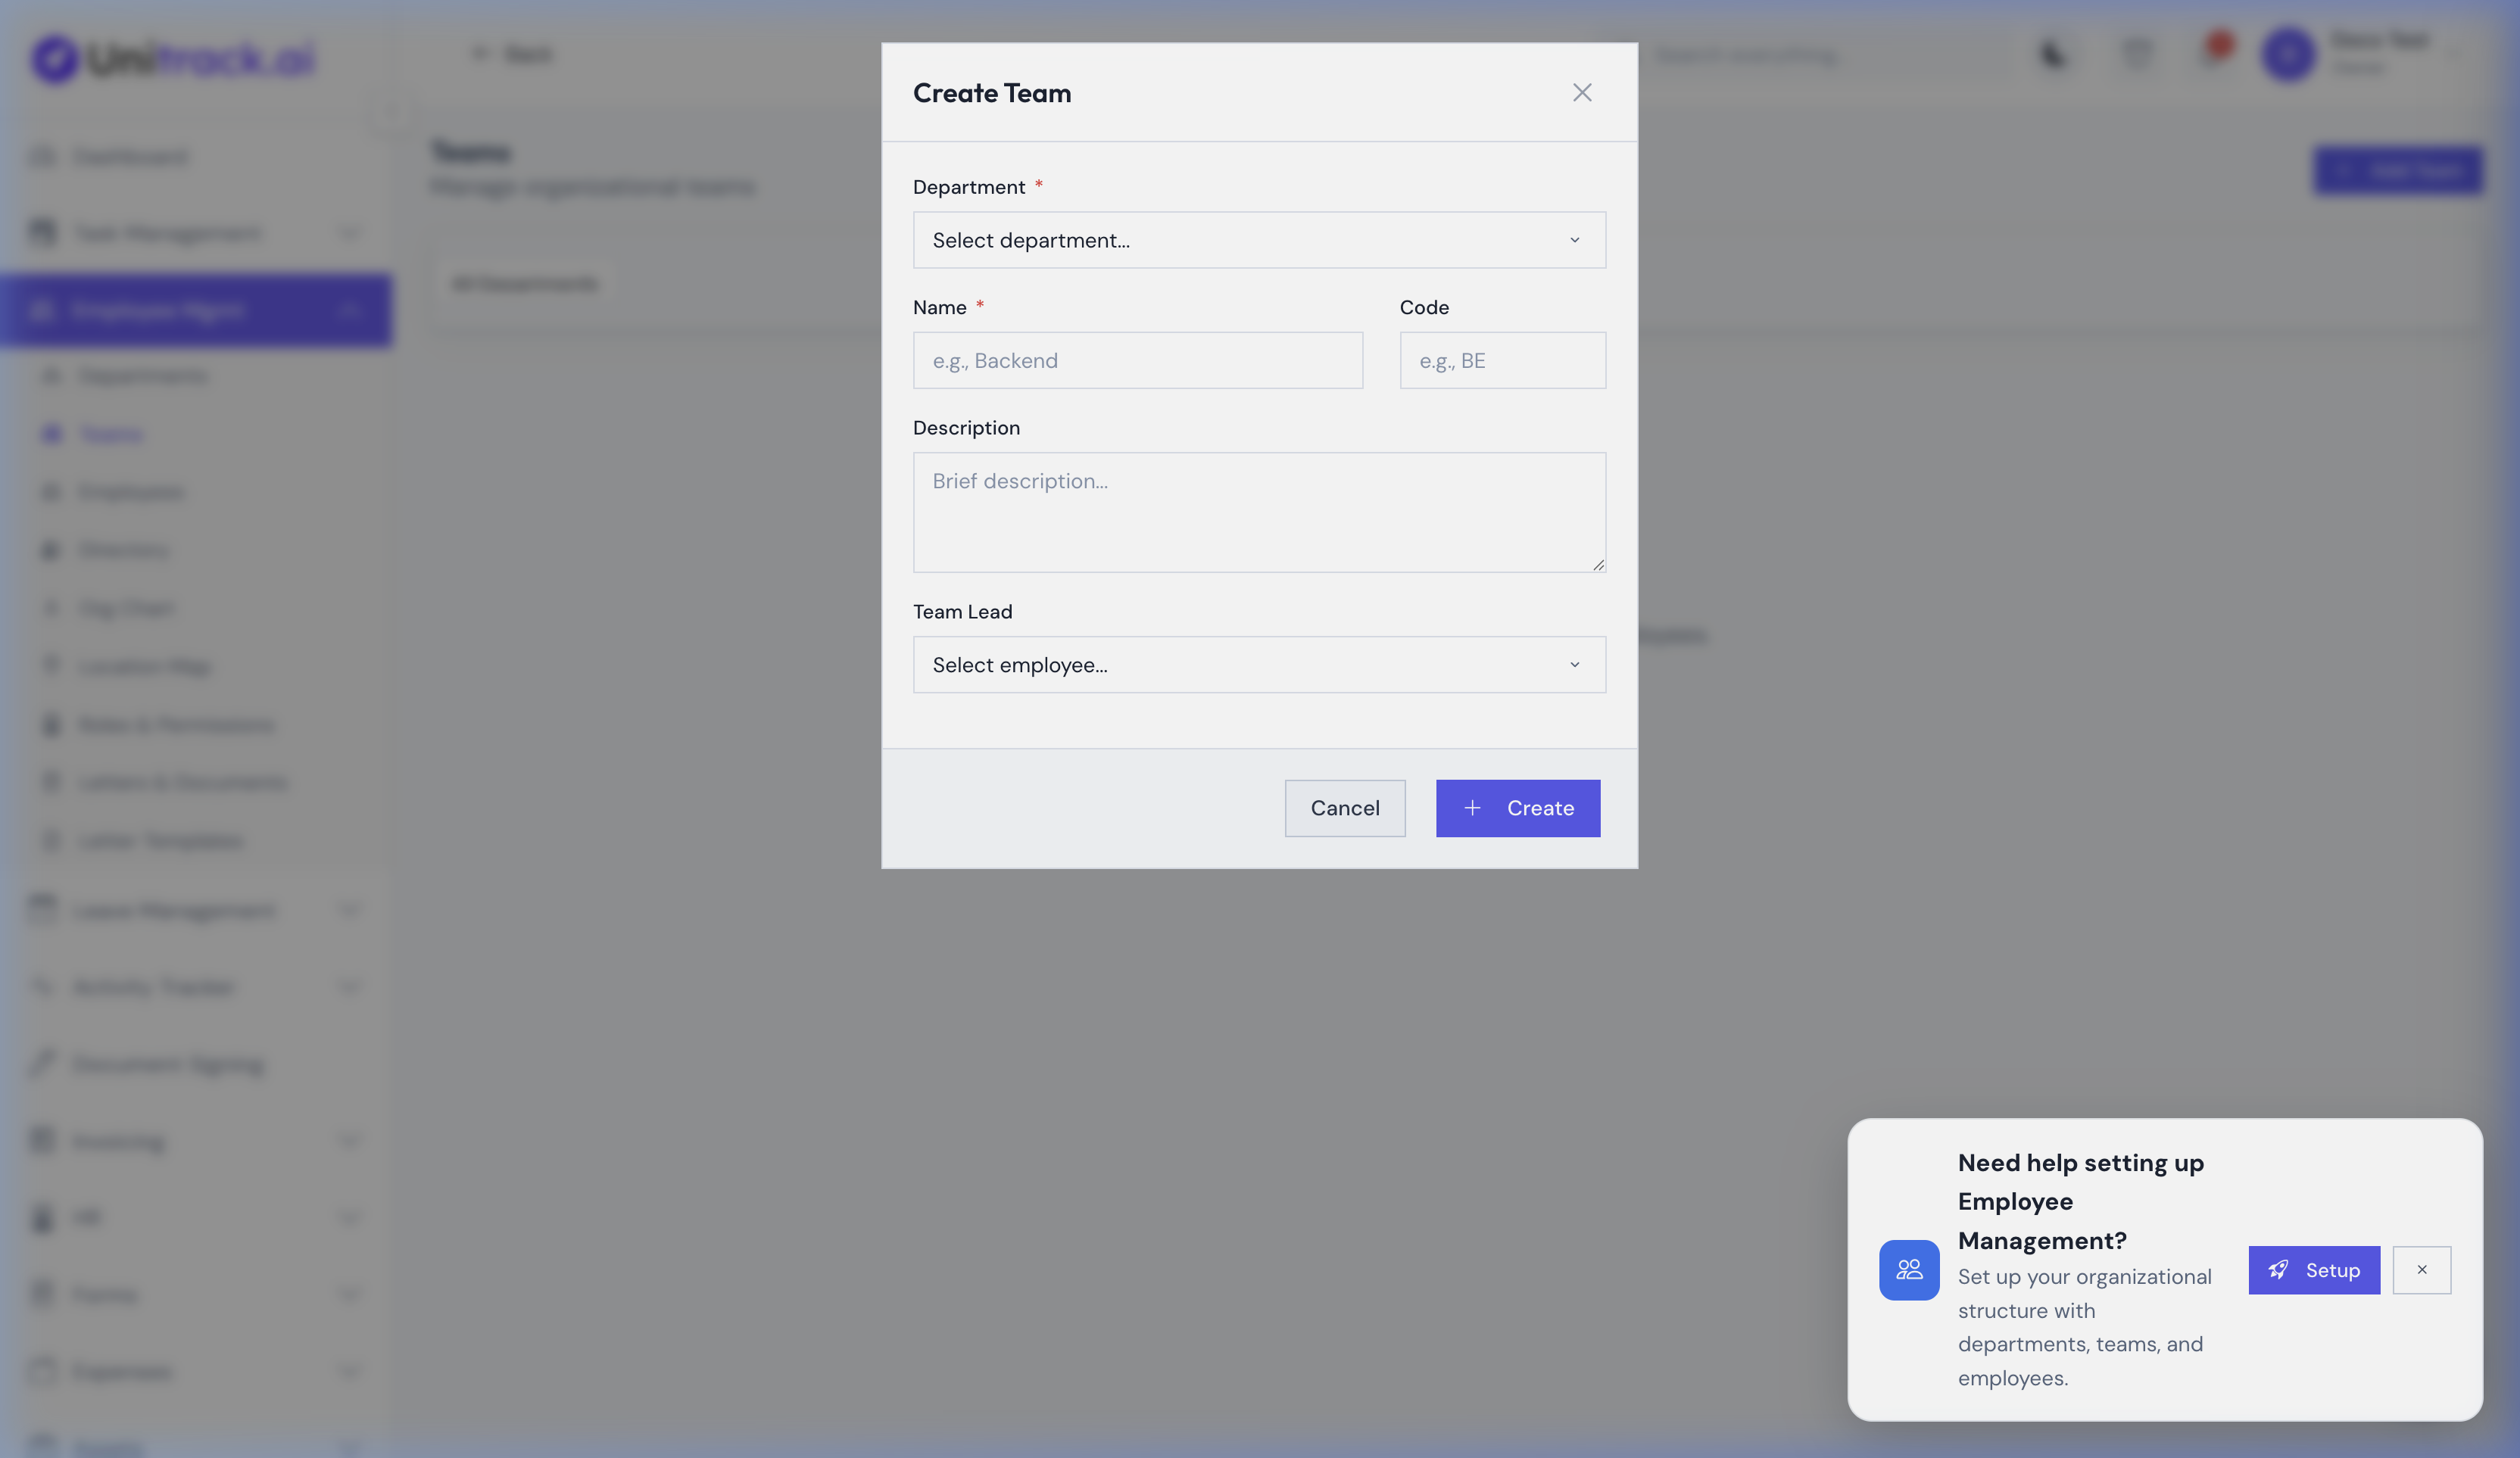
- 1Open the Team Form
Navigate to Employee Mgmt → Teams in the sidebar. Click + New Team.
- 2Link to a Parent Department
Department: First, you must select the parent department this team belongs to from the mandatory dropdown menu. For example, selecting "Engineering".
- 3Define Specific Team Details
Name: Give the team a specific operational name (e.g., "Enterprise Sales Squad A").
Description: Note what this squad is responsible for.
Team Lead: Assigning a Team Lead is absolutely critical for workflow automation. Select an existing employee from the dropdown. The person designated as Team Lead automatically receives all initial leave requests, expense reports, and task updates submitted by the members of this specific team for first-level approval.
4. Adding a New Employee
Now that your org structure exists, onboarding a new hire requires setting up their identity, organizational placement, and permissions.
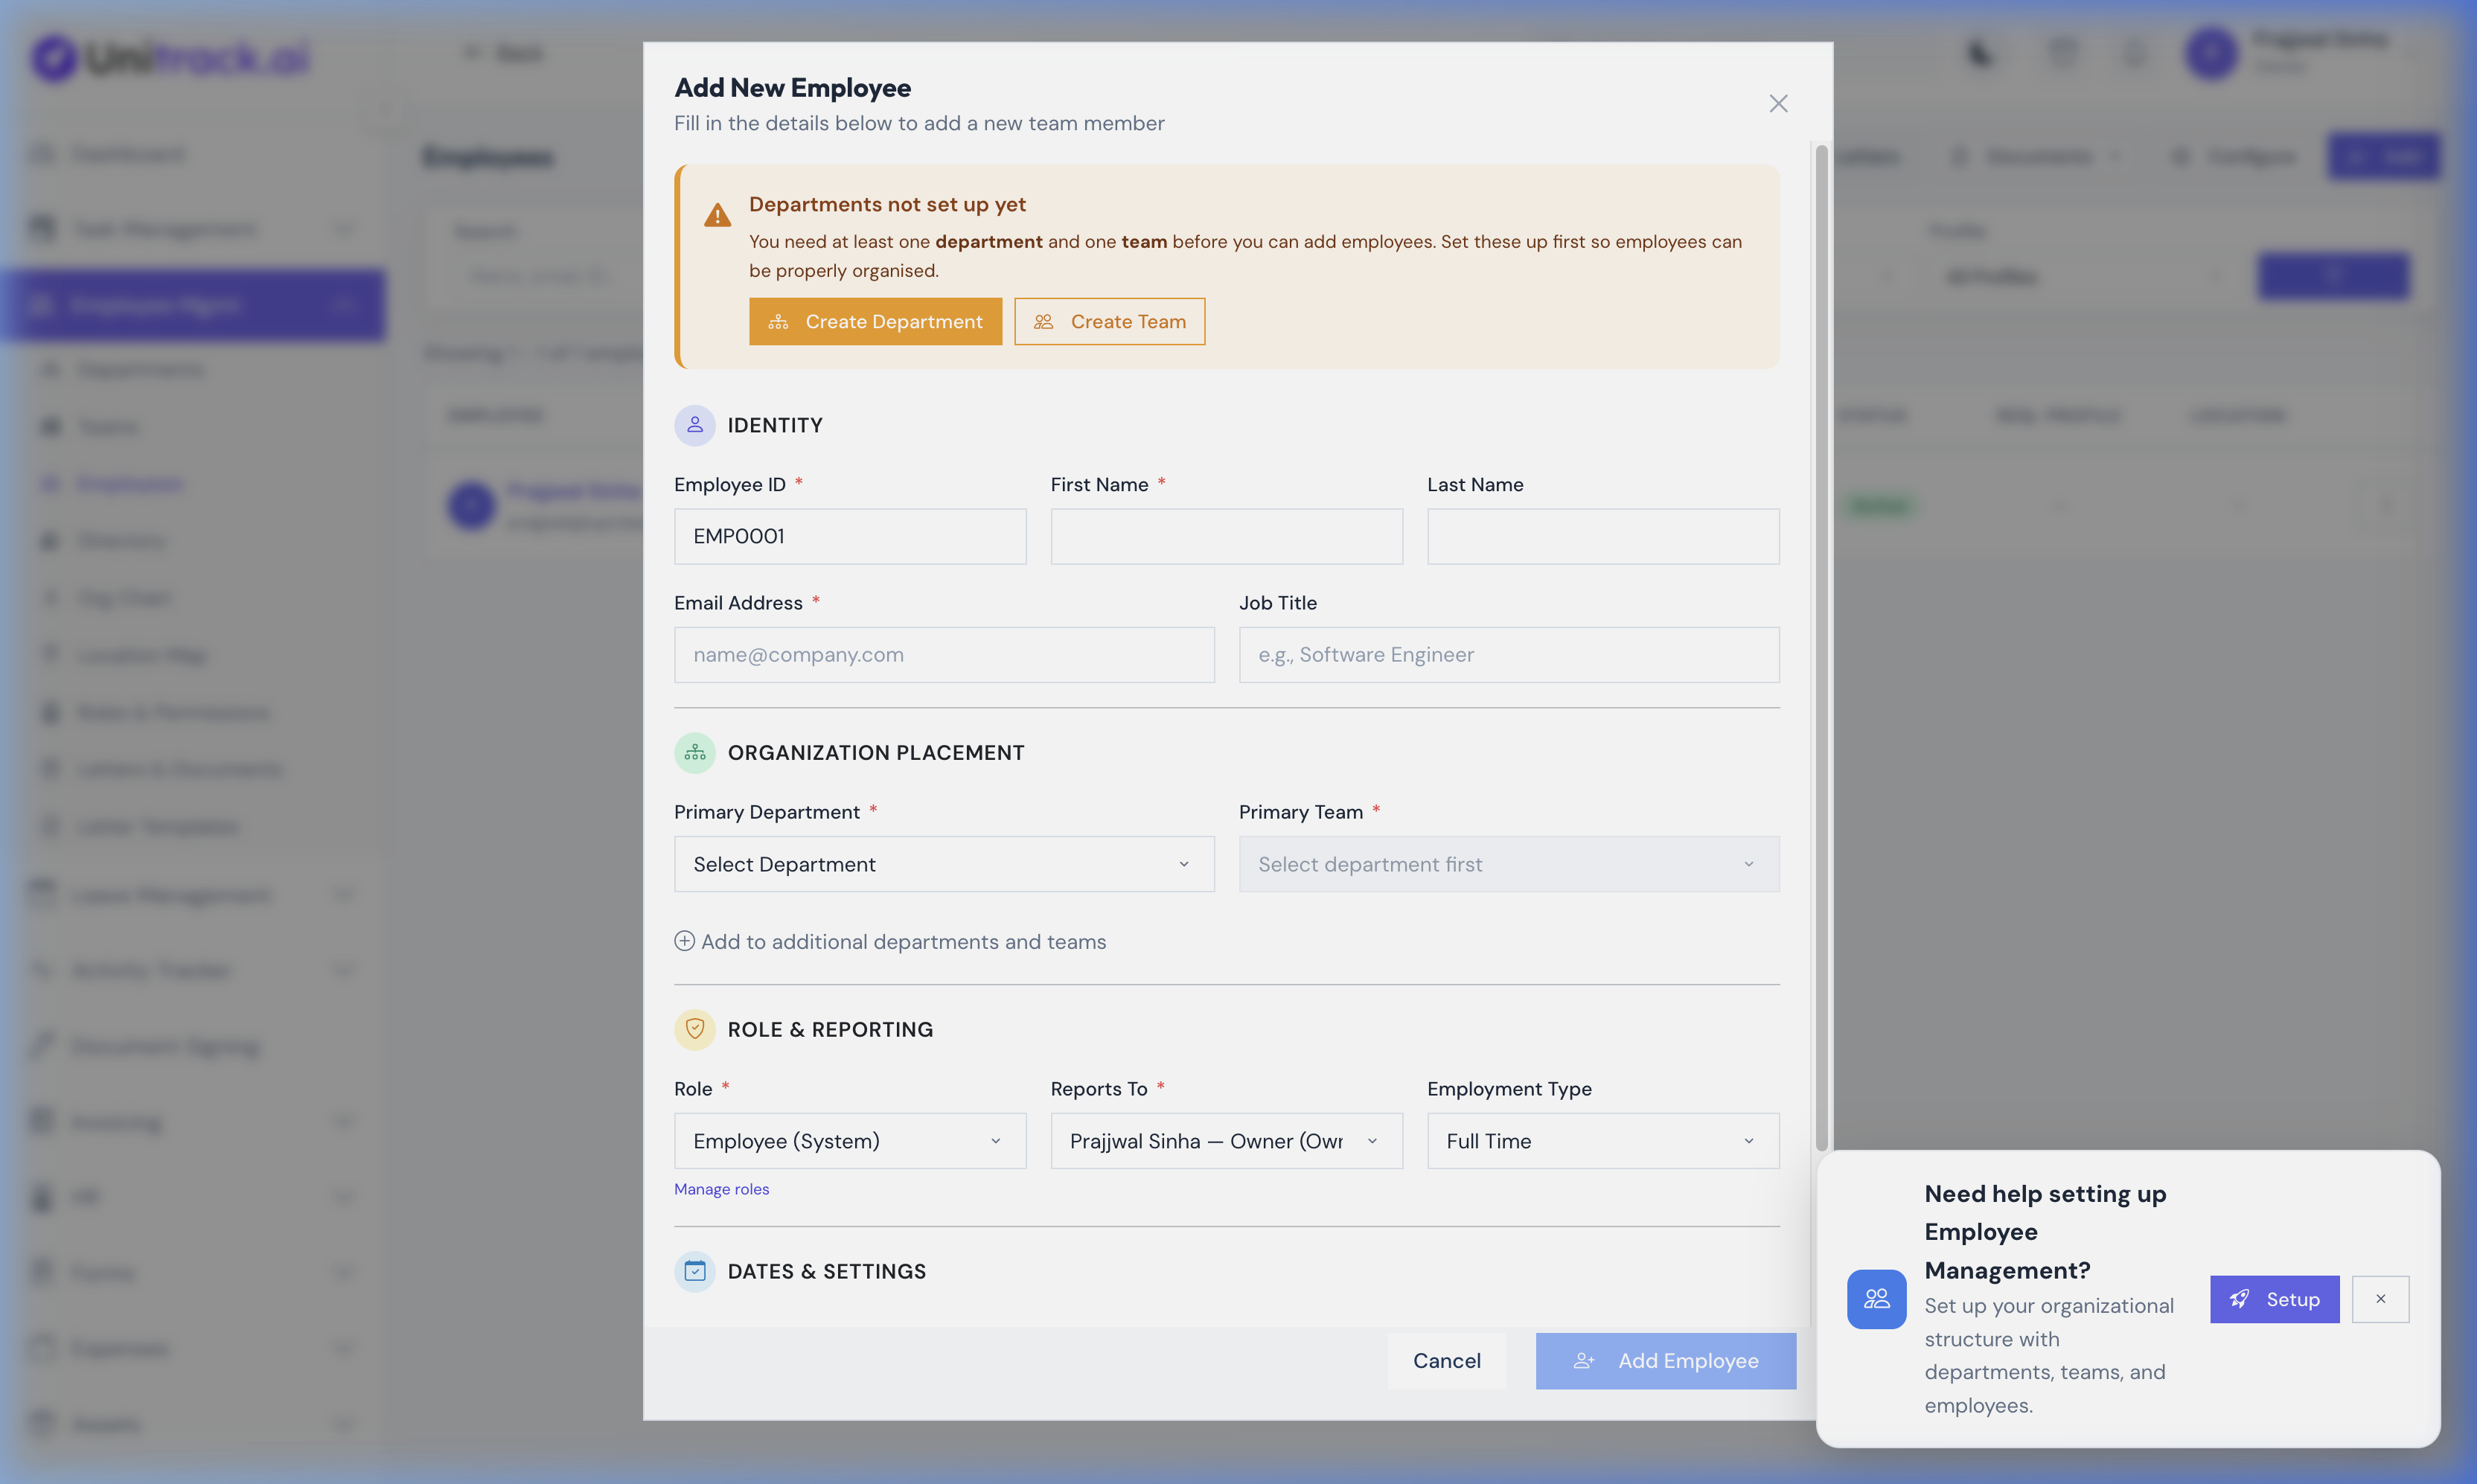
- 1Open the Add Modal
Click the + Add Employee button located at the top right of the Employee Directory.
- 2Identity Fields
Employee ID: A unique identifier (e.g., EMP-001) used across payroll and assets.
First/Last Name & Email: The exact legal name and their official work email address. The system will send their login invitation to this email. - 3Placement & Reporting Hierarchy
Primary Department & Primary Team: Select the entities you created in the previous steps. This accurately places them on the company org chart.
Designation/Job Title: E.g., "Senior Software Engineer".
Reports To: You must select their direct manager (different from Team Lead/Dept Head). This dictates who approves their daily agile tasks and specific requests. - 4Role Configuration & Compliance
Role: Select a system RBAC Role (such as 'Admin' or 'Employee') which dictates their software viewing permissions across the entire UniTrack platform.
Joining Date: Sets the date their leave accruals begin counting.
Compliance Toggles: Choose whether to force them to complete their extended HR profile before using the system, and whether to enforce live location tracking while they work.
4. Full Employee Profile View
A 360-degree view of an individual's career details, documents, and reporting chain.
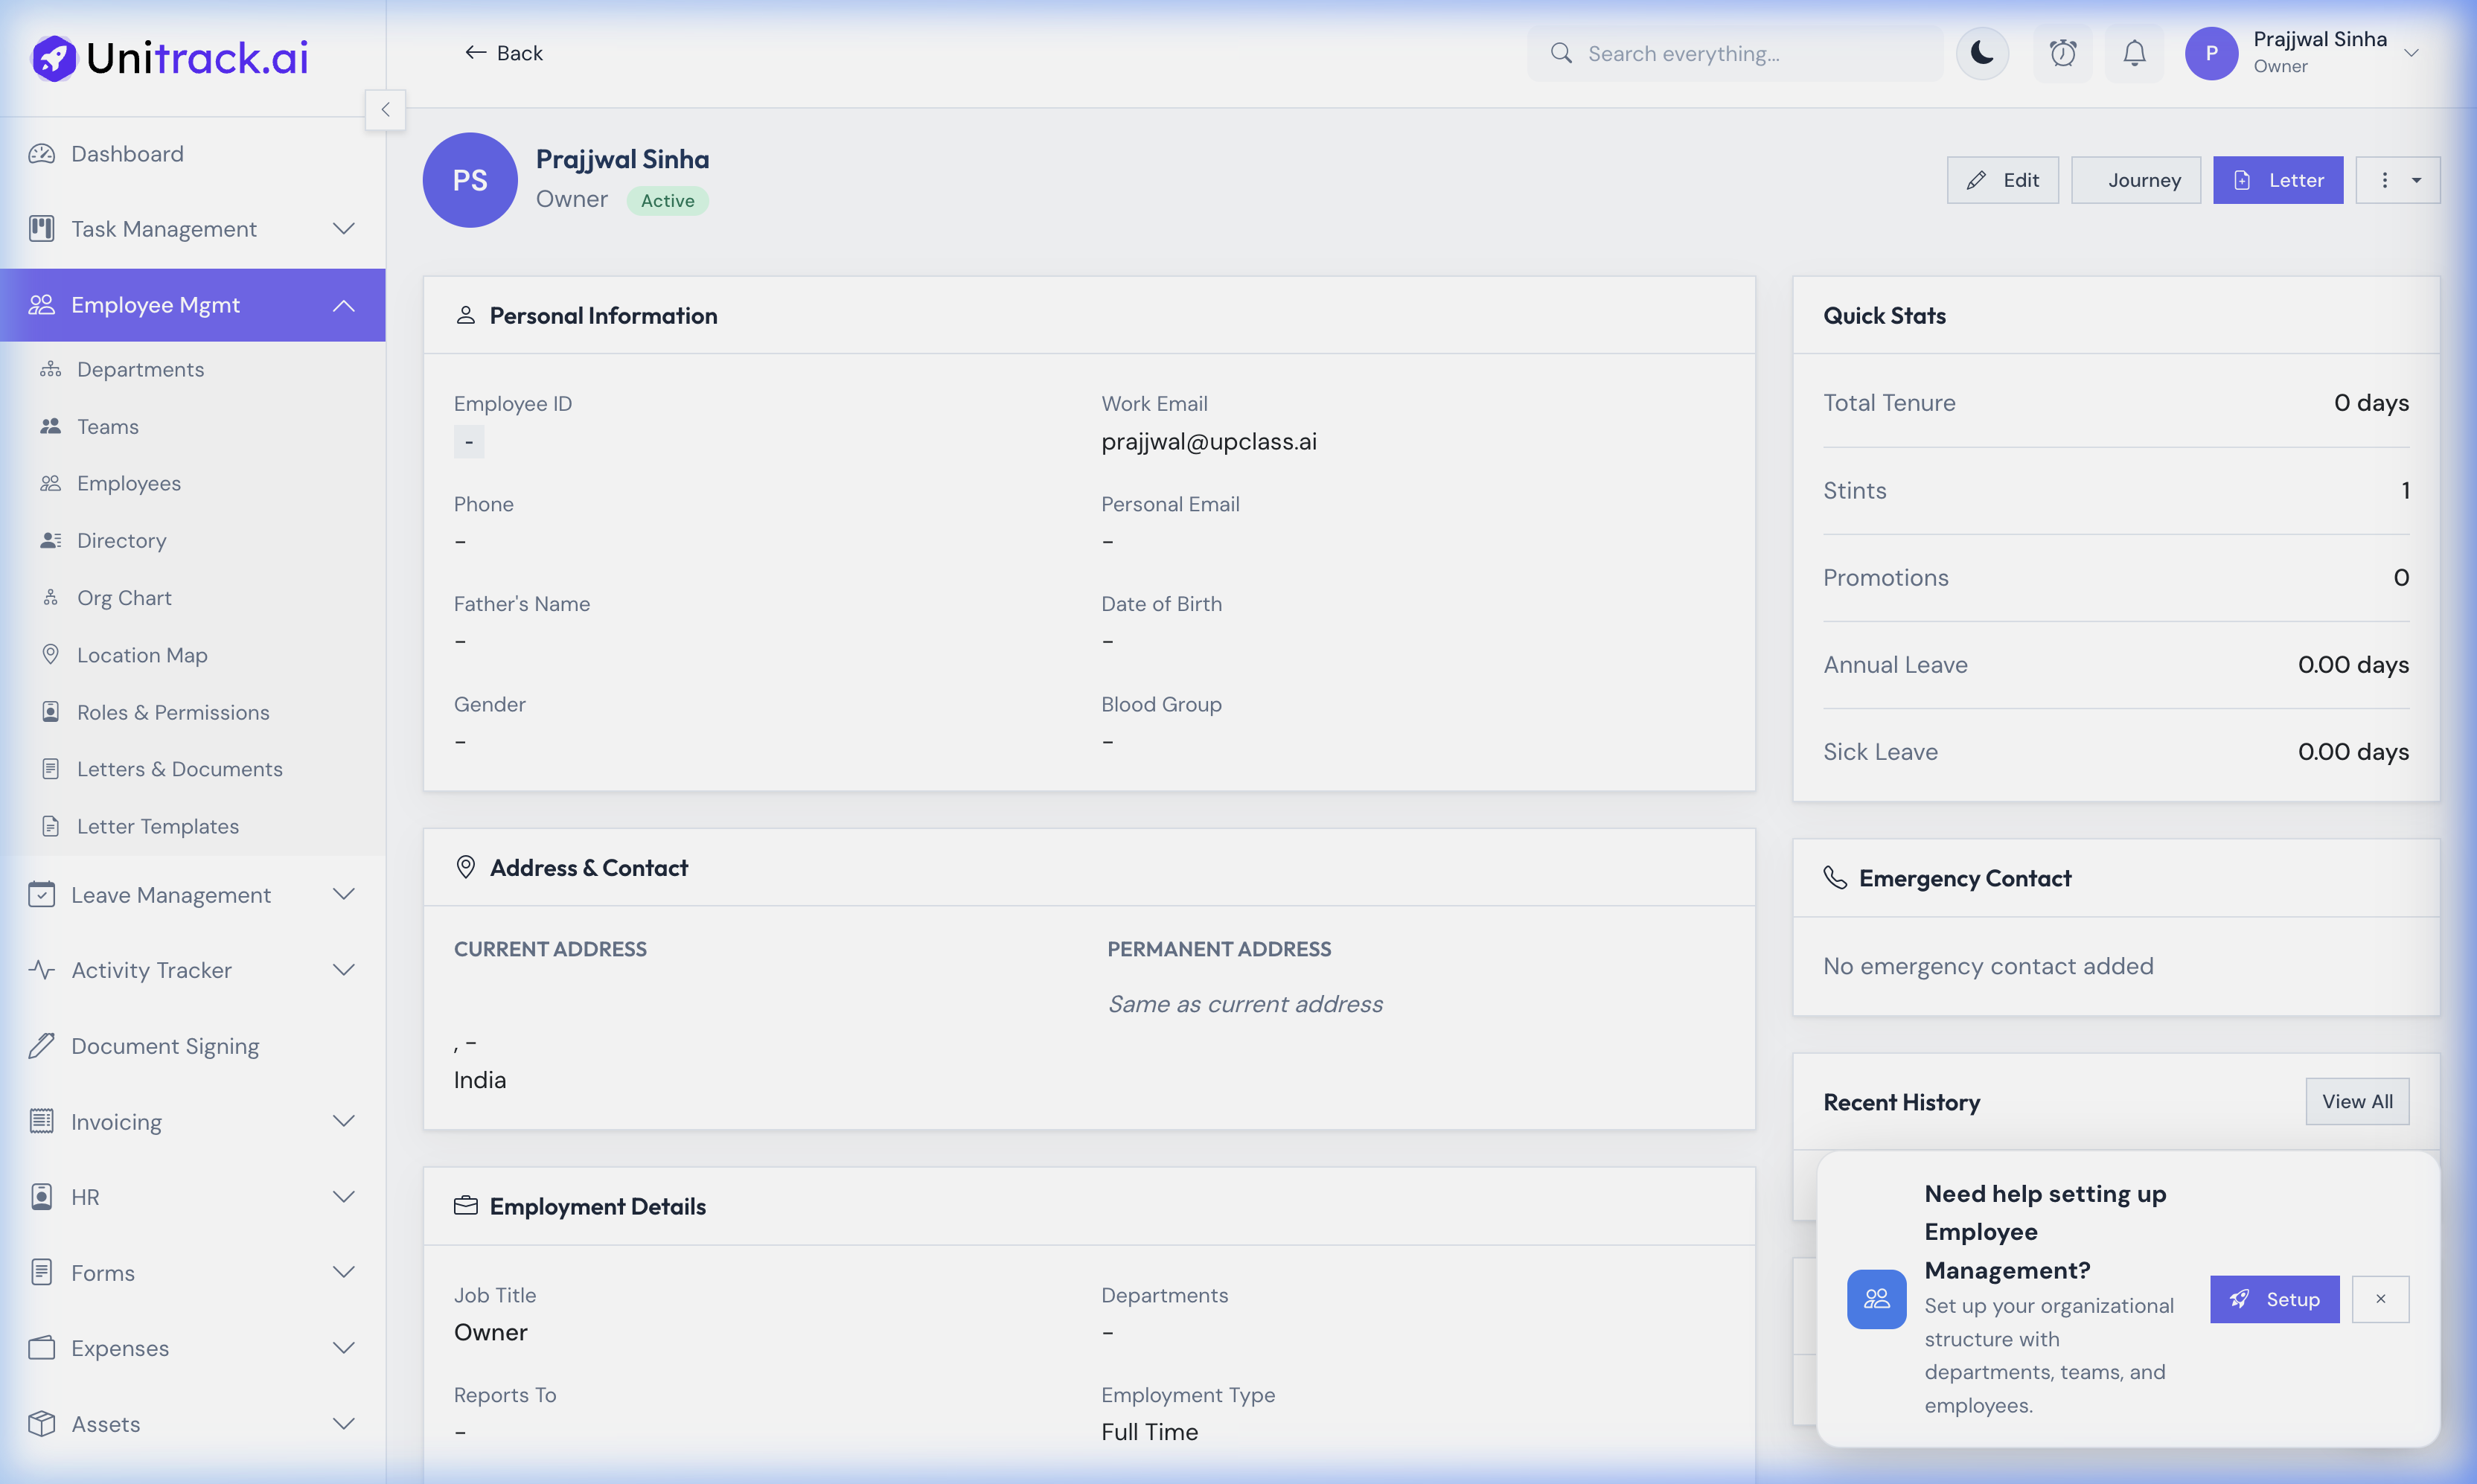
- 1Accessing the Profile
Click on any employee's name in the directory to view their comprehensive profile. The page is divided into logical sections like Employment Details, Personal Info, Address, and Emergency Contacts.
- 2Quick Stats & Hierarchy
The right sidebar summarizes their Tenure, current Leave Balance, and Total Logged Assets. It also displays a mini-org chart showing their direct Manager.
- 3Editing & Lifecycle Actions
From the profile header, Admins can edit details, generate formal HR Letters, view the chronological "Journey" timeline of their role changes, or execute deeper actions via the vertical ellipsis dropdown.